Why Do 18,000 BTU Mini Splits Almost Always Need 230V?
An 18,000 BTU mini split can move a lot of heat, and moving that heat takes electrical power. That is why most units in this size range are designed for 208/230-volt service instead of a standard 115-volt outlet. Higher voltage lets the system deliver the required power without drawing as much current, which generally makes the wiring and equipment more practical.
“Almost always” is the key phrase. Some smaller or specially designed systems may run on 115 volts, and product availability varies. But if you are shopping for an 18,000 BTU unit, expect 230V unless the manufacturer’s specifications clearly say otherwise. The unit’s nameplate and installation manual—not its BTU rating alone—determine the electrical requirements.
This guide explains the relationship between capacity and voltage, what to expect from installation, and how to compare brands such as Zone Air, MRCOOL, and Senville. It also covers the real-world difference between convenient 115V plug-in equipment and a 230V mini split that needs a dedicated circuit.
What “18,000 BTU” Tells You—and What It Doesn’t
BTU is a measure of heating or cooling capacity, not electrical consumption. An 18,000 BTU system is rated to move roughly 18,000 BTUs of heat per hour under specified test conditions. Its electrical input depends on efficiency, operating conditions, and the particular model.
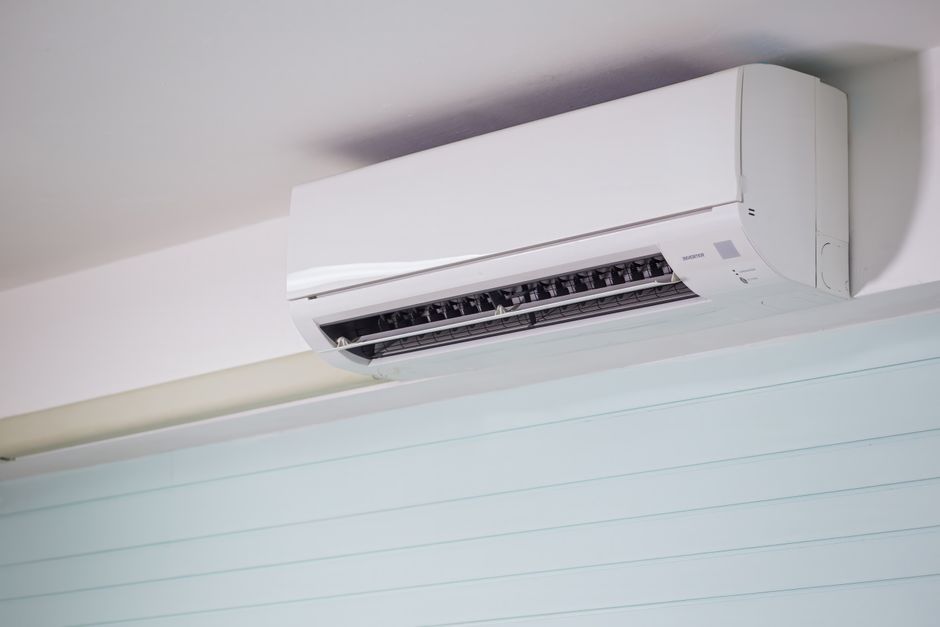
That distinction matters when comparing equipment. Two 18,000 BTU systems may have different input wattage and current draw. An inverter-driven model can vary compressor speed as demand changes, so it will not necessarily pull the same current all the time. Startup behavior, outdoor temperature, and whether the system is heating or cooling can also affect operation.
Why 230V Is the Usual Choice for 18,000 BTU Mini Splits
Voltage and current work together to deliver electrical power. In simplified terms, power equals voltage multiplied by current. To supply a similar amount of power at lower voltage, a circuit generally needs to carry more current. That is one reason higher-capacity mini splits commonly use 208/230V: they can deliver substantial power without requiring the same current that a 115V design would need.
For example, a hypothetical 2,400-watt load would draw about 20.9 amps at 115 volts, compared with about 10 amps at 240 volts, before accounting for power factor and other real-world details. This is an illustration, not a specification for any particular mini split. Actual requirements must come from the manufacturer’s nameplate and installation manual.
A lower-current design can make it easier to size the branch-circuit conductors and overcurrent protection appropriately. It also helps explain why a typical 18,000 BTU model is not simply a larger version of a plug-in room air conditioner. Its electrical setup is usually a planned part of the installation.. Exactly.
Understanding Mini Split Current Draw
When homeowners search for mini split current draw, they often want to know whether a system will work on an existing circuit. Don’t answer that question from BTUs, a product photo, or a general online chart. Check the unit’s electrical data, especially:
- Rated voltage: Commonly 208/230V for an 18,000 BTU system, but confirm the exact model.
- MCA (Minimum Circuit Ampacity): The minimum ampacity used to size circuit conductors according to the equipment instructions and applicable code.
- MOCP or maximum fuse/breaker rating: The maximum permitted overcurrent protection, as specified by the manufacturer.
- Operating current or rated input: Useful for understanding normal operation, but not a substitute for MCA and MOCP when planning the circuit.
Electrical rules and installation details vary by location and Look at more info equipment. A licensed electrician can confirm whether an existing panel has capacity, select the right circuit components, and install a disconnect where required. Never assume a 230V receptacle or breaker is suitable just because its voltage looks right.
115V Plug-In Convenience vs. 230V Hardwire Costs
A 115V system can be appealing because it may plug into an appropriate existing outlet. That can reduce electrical work in a suitable application, but “plug-in” does not mean “any outlet will do.” The circuit must still meet the product’s requirements, and the outlet should not be shared with incompatible loads.
With a 230V mini split, homeowners should usually plan for a dedicated circuit and a permanent electrical connection or other connection method specified by the manufacturer. If the electrical panel is nearby and has capacity, the added work may be relatively straightforward. If the panel is full, far from the outdoor unit, or requires upgrades, the electrical portion can become a significant part of the project budget.
Consideration 115V plug-in design Typical 230V 18,000 BTU design Convenience May use a suitable existing outlet Usually requires a dedicated electrical installation Typical capacity range More common among smaller systems Common for higher-capacity mini splits Electrical planning Verify outlet and circuit requirements Verify voltage, MCA, MOCP, wiring, and disconnect requirements Main trade-off Convenience, with fewer high-capacity choices More installation planning, with broader high-capacity availabilityThe cost comparison is therefore more than the price of a unit. Include the circuit, any panel work, line-set routing, mounting, condensate drainage, and commissioning. Get an electrical quote before choosing a system if the installation will depend on new 230V service.
True DIY vs. Flare Install Reality
Mini split listings often describe a system as “DIY,” but that label can cover very different installation requirements. Some products use specialized precharged line-set connections intended to reduce the amount of refrigerant work required in the field. Others use conventional flare connections, which demand clean, accurately prepared tubing and careful tightening to the manufacturer’s specifications.
A conventional flare installation is not just attaching two nuts. The copper must be cut cleanly, deburred without contaminating the tubing, flared with the correct tool, and connected without twisting or damaging the line. A poor flare can leak refrigerant. Over-tightening can also damage the flare or connection; under-tightening can leave a leak. The correct process and torque values come from the equipment instructions.
Commissioning may require specialized procedures and tools, including a Vacuum pump and Manifold gauges. These are used by trained installers to prepare and verify the refrigerant circuit as directed by the manufacturer. A vacuum pump is not a shortcut for correcting a bad flare, and gauge readings alone do not prove that every joint is leak-free.
Before buying a “DIY” system, confirm exactly what the product includes and what it still requires. Ask whether the line set is precharged, what connection type it uses, whether special tools are needed, and what the warranty says about installation. Also check local rules: electrical work and refrigerant handling may be subject to licensing or permitting requirements. DIY-friendly equipment can simplify some steps, but it does not remove the need for a sound electrical and mechanical installation.
Cold-Climate Ratings and Capacity Drop
Heating performance is another reason to look beyond the headline BTU number. A mini split’s rated heating capacity is measured under defined conditions; it does not promise that the system will deliver that same output at every outdoor temperature. As the weather gets colder, available capacity and efficiency can change. The amount of change varies by model.
For a cold-climate installation, compare the manufacturer’s capacity data at the outdoor temperatures that matter in your area. Look for low-ambient heating specifications, the system’s rated capacity at colder conditions, and the operating-temperature range. A unit that is a comfortable fit at mild temperatures may not cover the home’s full heating load during a deep cold snap.
Correct sizing still matters. An oversized system can cycle or operate less effectively in some conditions, while an undersized system may struggle to maintain comfort when temperatures fall. A contractor can perform a load calculation and account for insulation, windows, air leakage, room layout, and climate—not just square footage.

Comparing Zone Air, MRCOOL, and Senville
Brand comparisons are most useful when they focus on the exact model and installation package rather than assuming every product from a company has the same features. Zone Air, MRCOOL, and Senville each offer mini split options, but model availability, included accessories, warranty terms, and installation requirements can differ. Read the specifications and terms for the system you are actually considering.
Zone Air: Price and Package Details
For a practical price reference, Zone Air 12,000 BTU single zone typical price: ~$1,999 direct. Treat that as an example for a particular capacity and sales context, not a quote for an 18,000 BTU system or a guarantee of today’s price. Check what is included—such as the indoor and outdoor units, line set, mounting hardware, and electrical components—and whether shipping or installation is extra.
You know what's funny? when comparing zone air with other brands, look at the delivered system cost and the published specifications. A lower equipment price is valuable only if the package suits the job, the required accessories are available, and the warranty and service terms meet your expectations.
MRCOOL: DIY-Oriented Options
MRCOOL is often considered by shoppers looking for DIY-oriented mini split options. That can be attractive when a product’s connection system is designed to simplify installation. Still, read the exact model’s instructions: not every system is installed the same way, and “DIY” does https://tessatopmaid.com/is-a-concealed-ducted-mini-split-worth-it-for-a-cleaner-look/ not necessarily mean no electrical work, permits, commissioning steps, or warranty conditions.
Senville: Compare Model Specifications
Senville is another brand homeowners may encounter when comparing mini splits across capacity and feature levels. Compare its model-specific heating data, voltage and circuit requirements, included line-set details, operating-temperature range, and warranty. Those details are more useful than a brand name alone when deciding whether a particular unit fits a cold-climate or DIY project.
How to Choose an 18,000 BTU System
- Confirm the load. Have the heating and cooling needs evaluated rather than choosing by square footage alone.
- Check voltage and current requirements. Use the exact model’s nameplate and manual to confirm voltage, MCA, and MOCP.
- Price the electrical work. Find out whether your panel can support the new circuit and what installation will cost.
- Compare cold-weather performance. Review capacity at low outdoor temperatures if the unit will provide winter heating.
- Understand the refrigerant connections. Determine whether the system uses conventional flares or a specified quick-connect approach and what tools or skills are required.
- Compare the complete package. Include equipment, line set, accessories, delivery, permits, and professional labor where needed.
Bottom Line
Most 18,000 BTU mini splits use 230V because that voltage is a practical way to supply the power a higher-capacity system needs without relying on the higher current a comparable 115V design would generally require. There are exceptions, but the product’s electrical specifications—not assumptions based on capacity—should guide the decision.
Think of bigger mini split power as a system-planning question, not just a unit-size question. Verify the circuit requirements, account for electrical installation costs, evaluate cold-weather capacity, and be realistic about flare work and commissioning. Whether you are comparing Zone Air, MRCOOL, or Senville, the right choice is the model that fits the load, the site, the electrical service, and the installation approach.